Installation
Overview
The plug-in can be installed using the plug-in sample application or DDL Scripts installation file. The plug-in installation must be finished by activating the plug-in license.
Please make sure you read this part, as it is necessary for every installation of the plugin
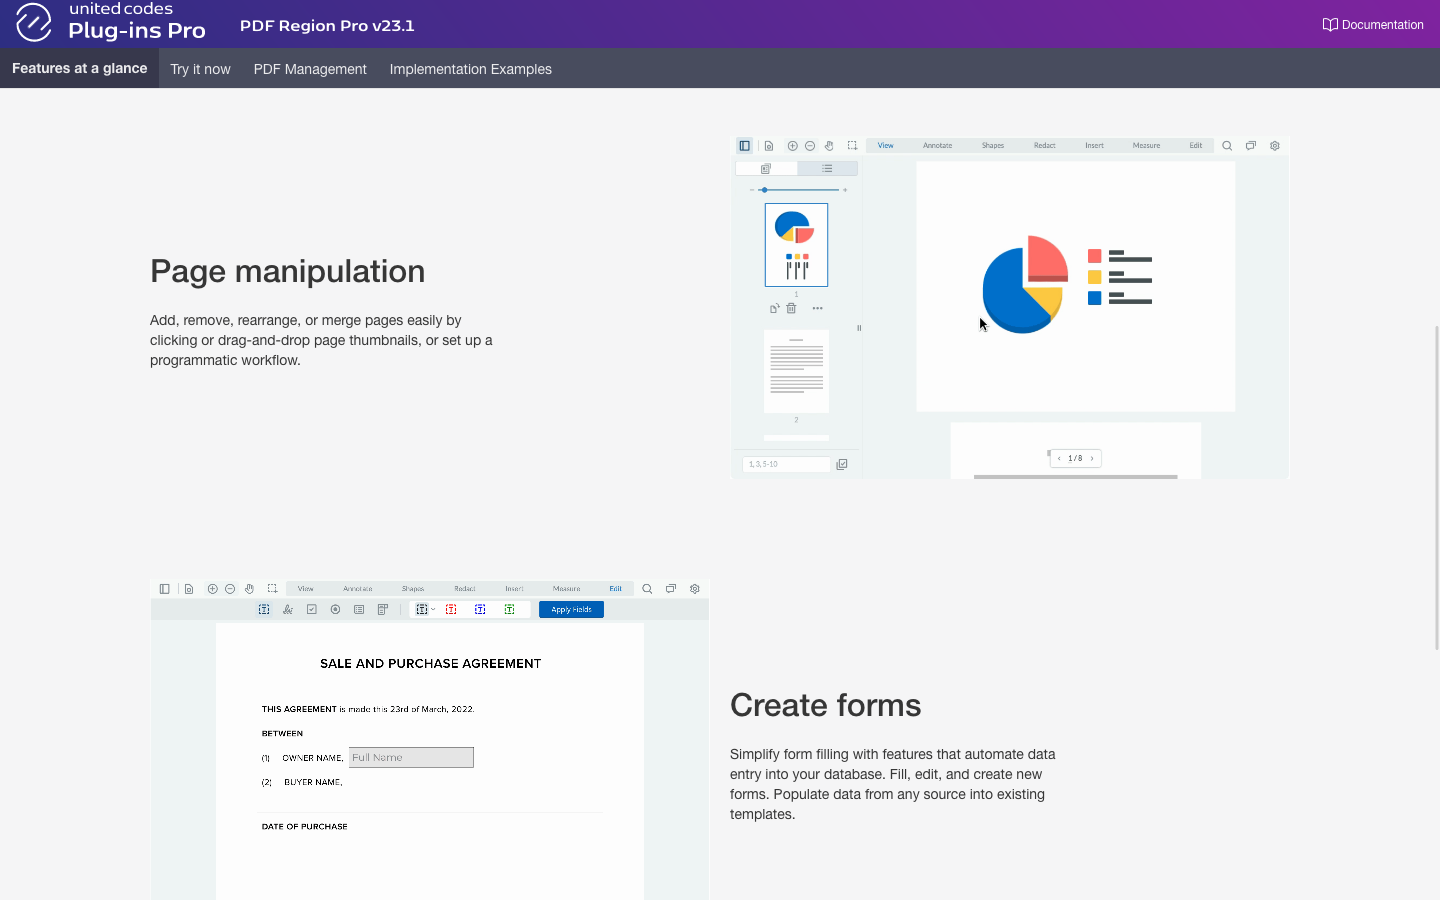
Explore plug-in capabilities and features
If you want to explore how the plug-in is used in the public sample application, you should choose sample application installation method. The plug-in sample application allows you to explore all the plug-in features in an already built and configured sample application.
This method is the easiest and fastest because it comes down to Importing and installing the sample application file:
- Install the plug-in sample application
- Activate the plug-in license
Use the plug-in in an existing application
If you want to start using the plug-in in your application, you should choose manual installation method. The plug-in bundle contains DDL scripts creating only mandatory database objects and the plug-in installation file. The supporting plug-ins have to be installed one by one.
The manual installation includes the following steps:
- Import & run the DDL script creating database objects
- Import & install the plug-in
- (optional) Install the supporting plug-ins
- Activate the plug-in license
Installation pre-requisites
- Oracle Database 12c or above
- Oracle Application Express (APEX) 19.2 or above installed
Sample application installation
Overview
The plug-in sample application is the easiest way to explore the plug-in features. The sample application implements basic and advanced examples showcasing the plug-in in action.
The sample application is a good starting point to understand how easy it is to use the plug-in and how to integrate supporting plug-ins using Oracle APEX dynamic actions and processes.
Learn more about data objects the sample application uses in the section Item plug-in \ Database objects.
Importing the Sample Application
-
Log into your APEX application builder
-
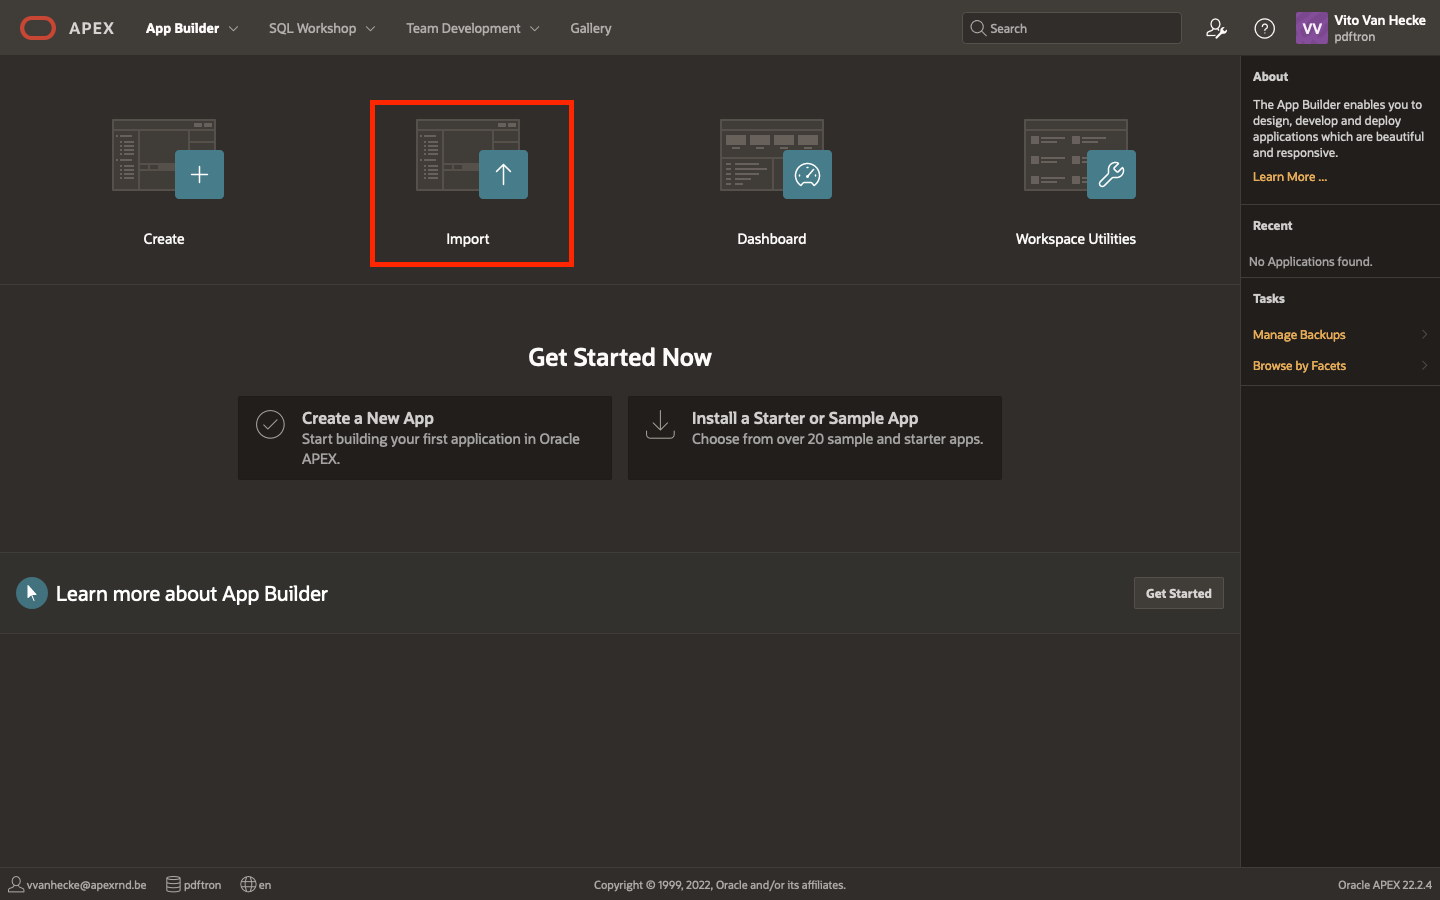
Click on the Import button to start the Oracle APEX application installation wizard
-
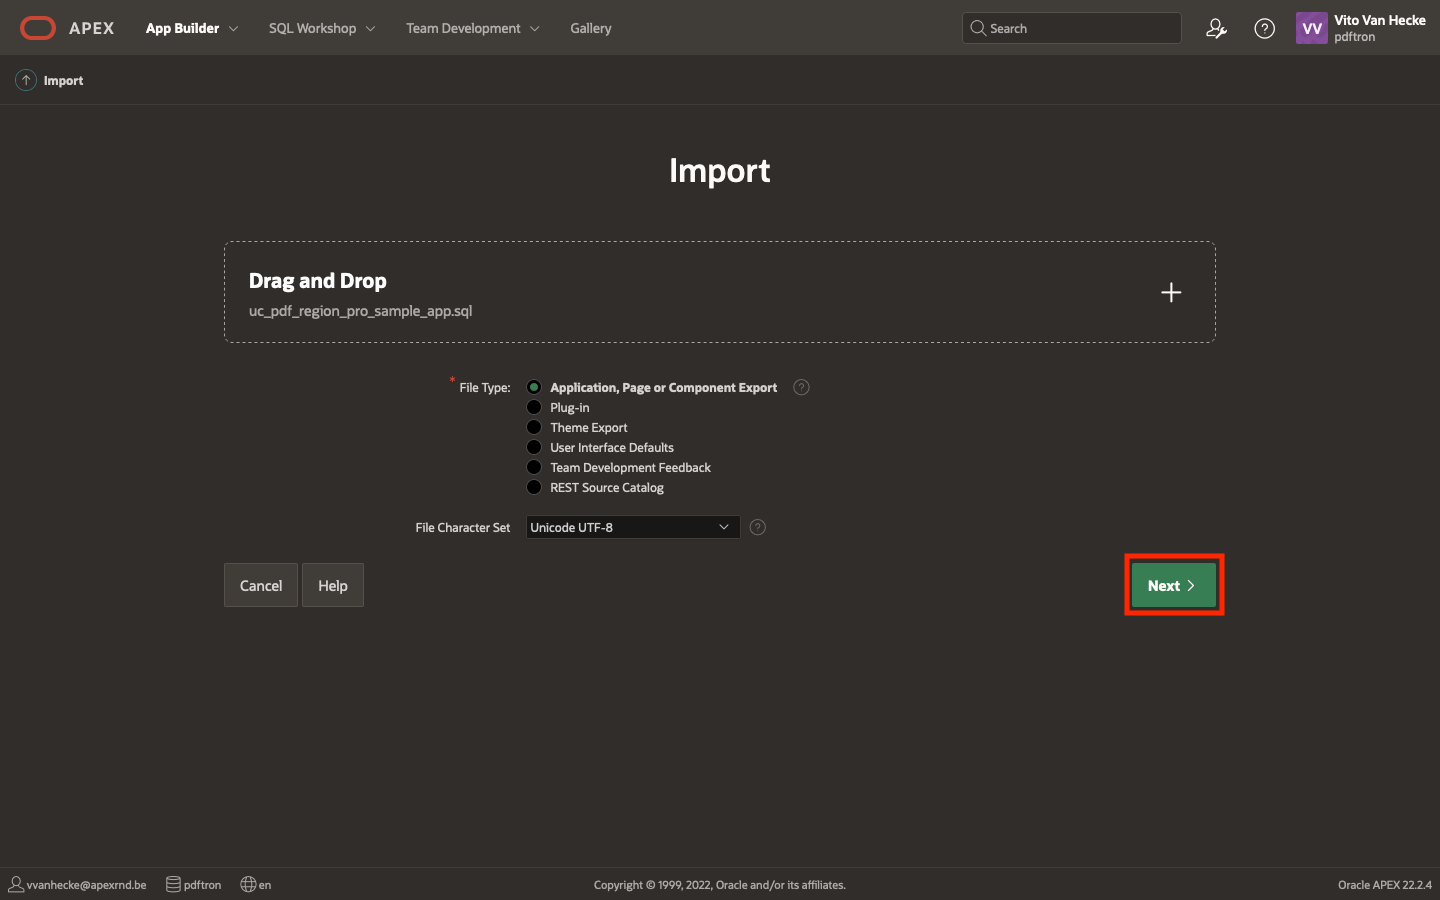
Click on the Drag and Drop region
-
Select the sample application file
app_unitedcodes_pdf_region_pro.sql -
Click the Next button
-
After successfully uploading the application installation file, you will see a file import confirmation.
-
Click the Next button
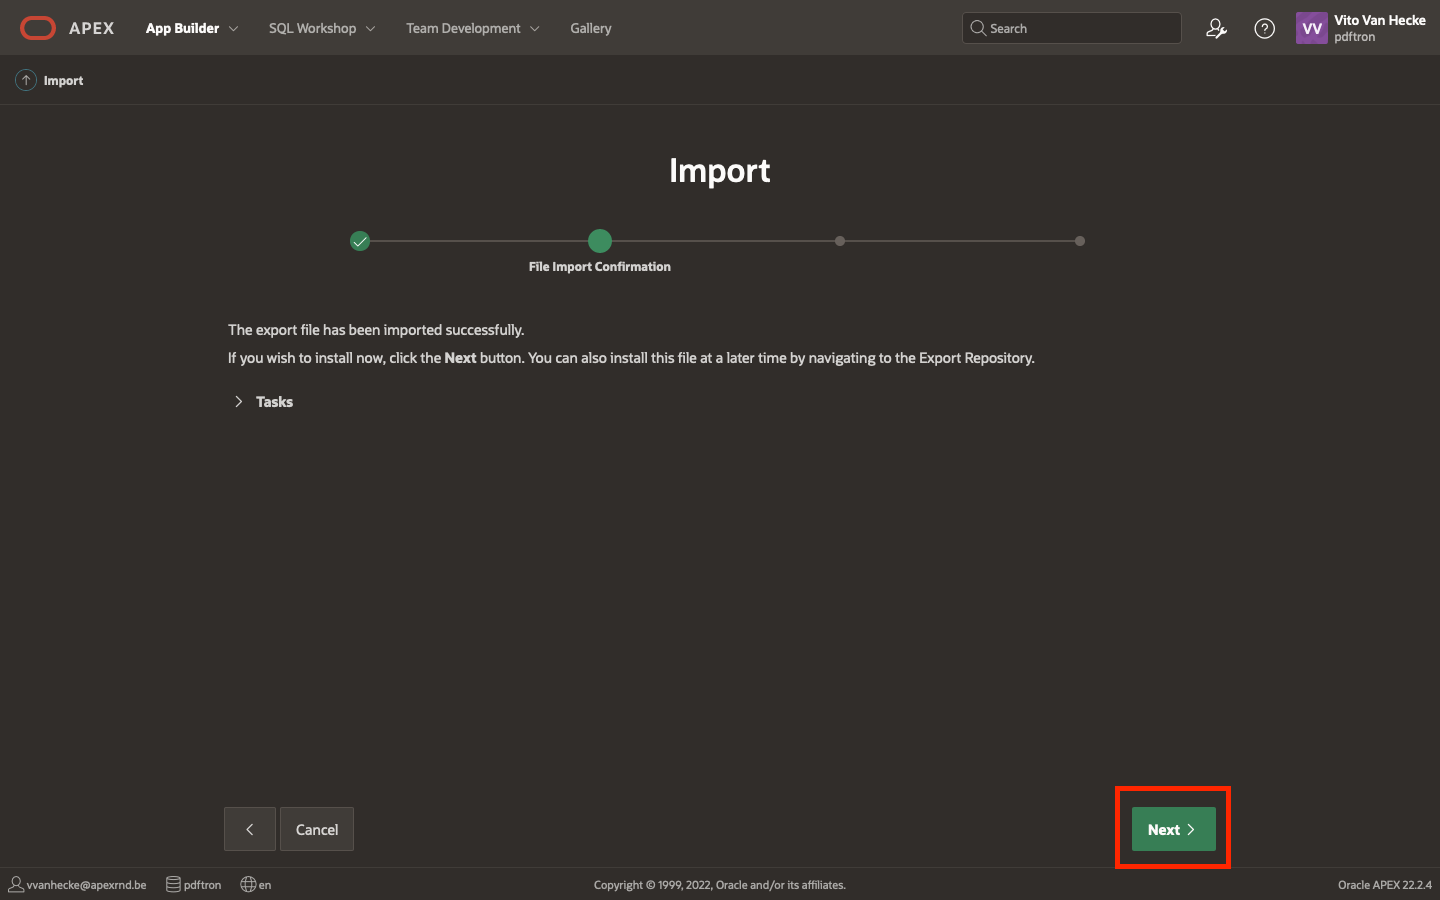
Proceed to the next installation step Set the application installation settings
Set the application installation settings
-
Configure or use the default values in the form
-
Click the Install Application button
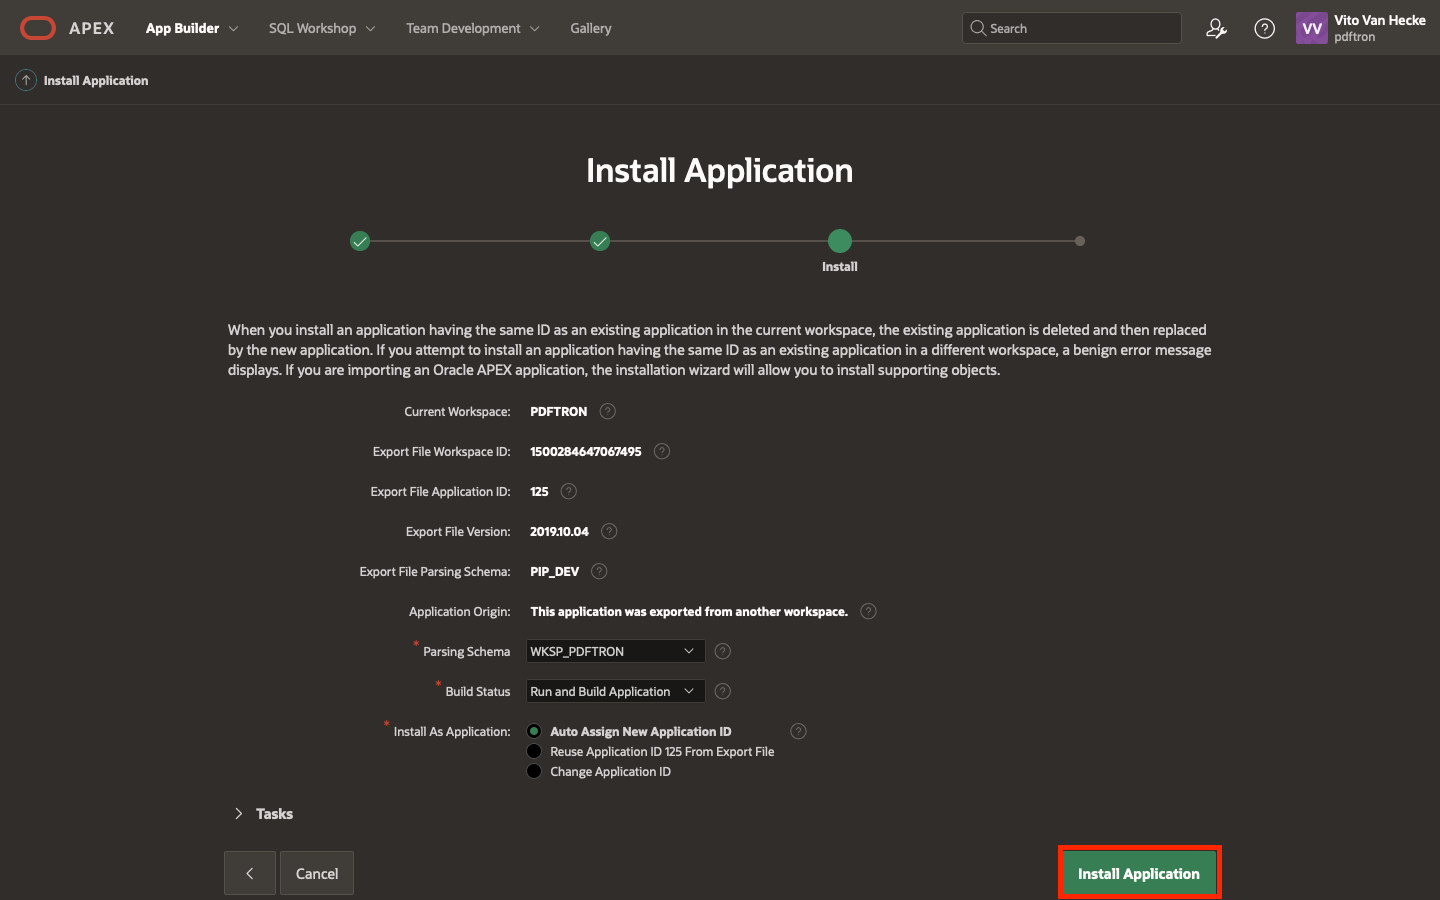
-
Don't close the page - wait until APEX finishes installing the application. When the application installation is complete, you will be redirected to the next step.

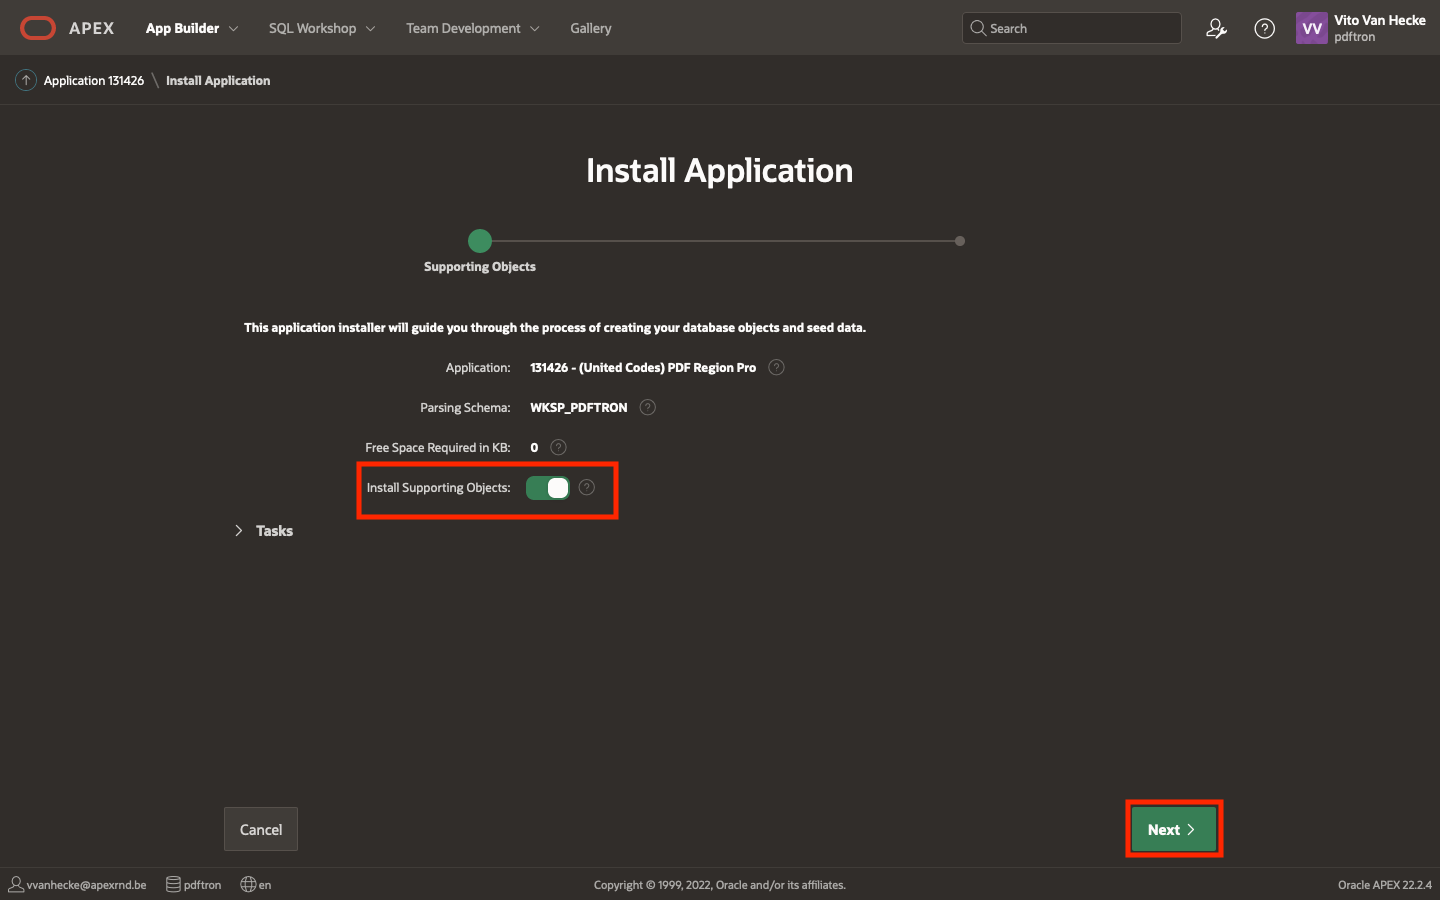
-
Make sure Install Supporting Objects is enabled (the sample application requires all supporting objects installed)
-
Click the Next button
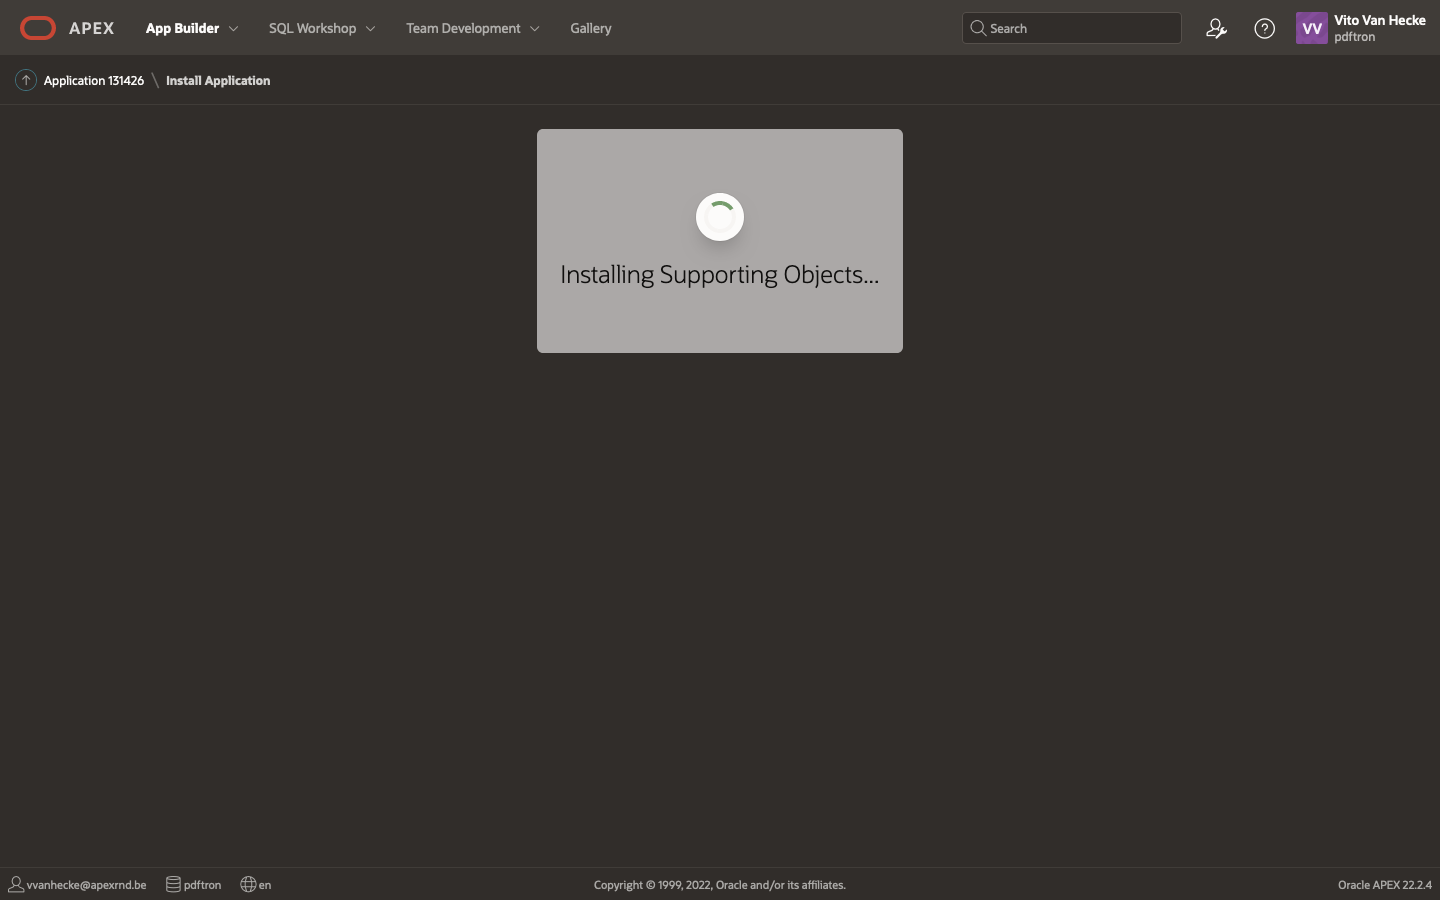
-
Click the Install button

-
Don't close the page - wait until APEX finishes installing the supporting objects.
-
When the supporting objects are installed, you will be redirected to the next step.
-
You will see the installation wizard confirmation when the installation finishes.

If an error terminates the installation, it can be verified by clicking the Install Summary button - the summary shows the status of all the installed supporting objects.

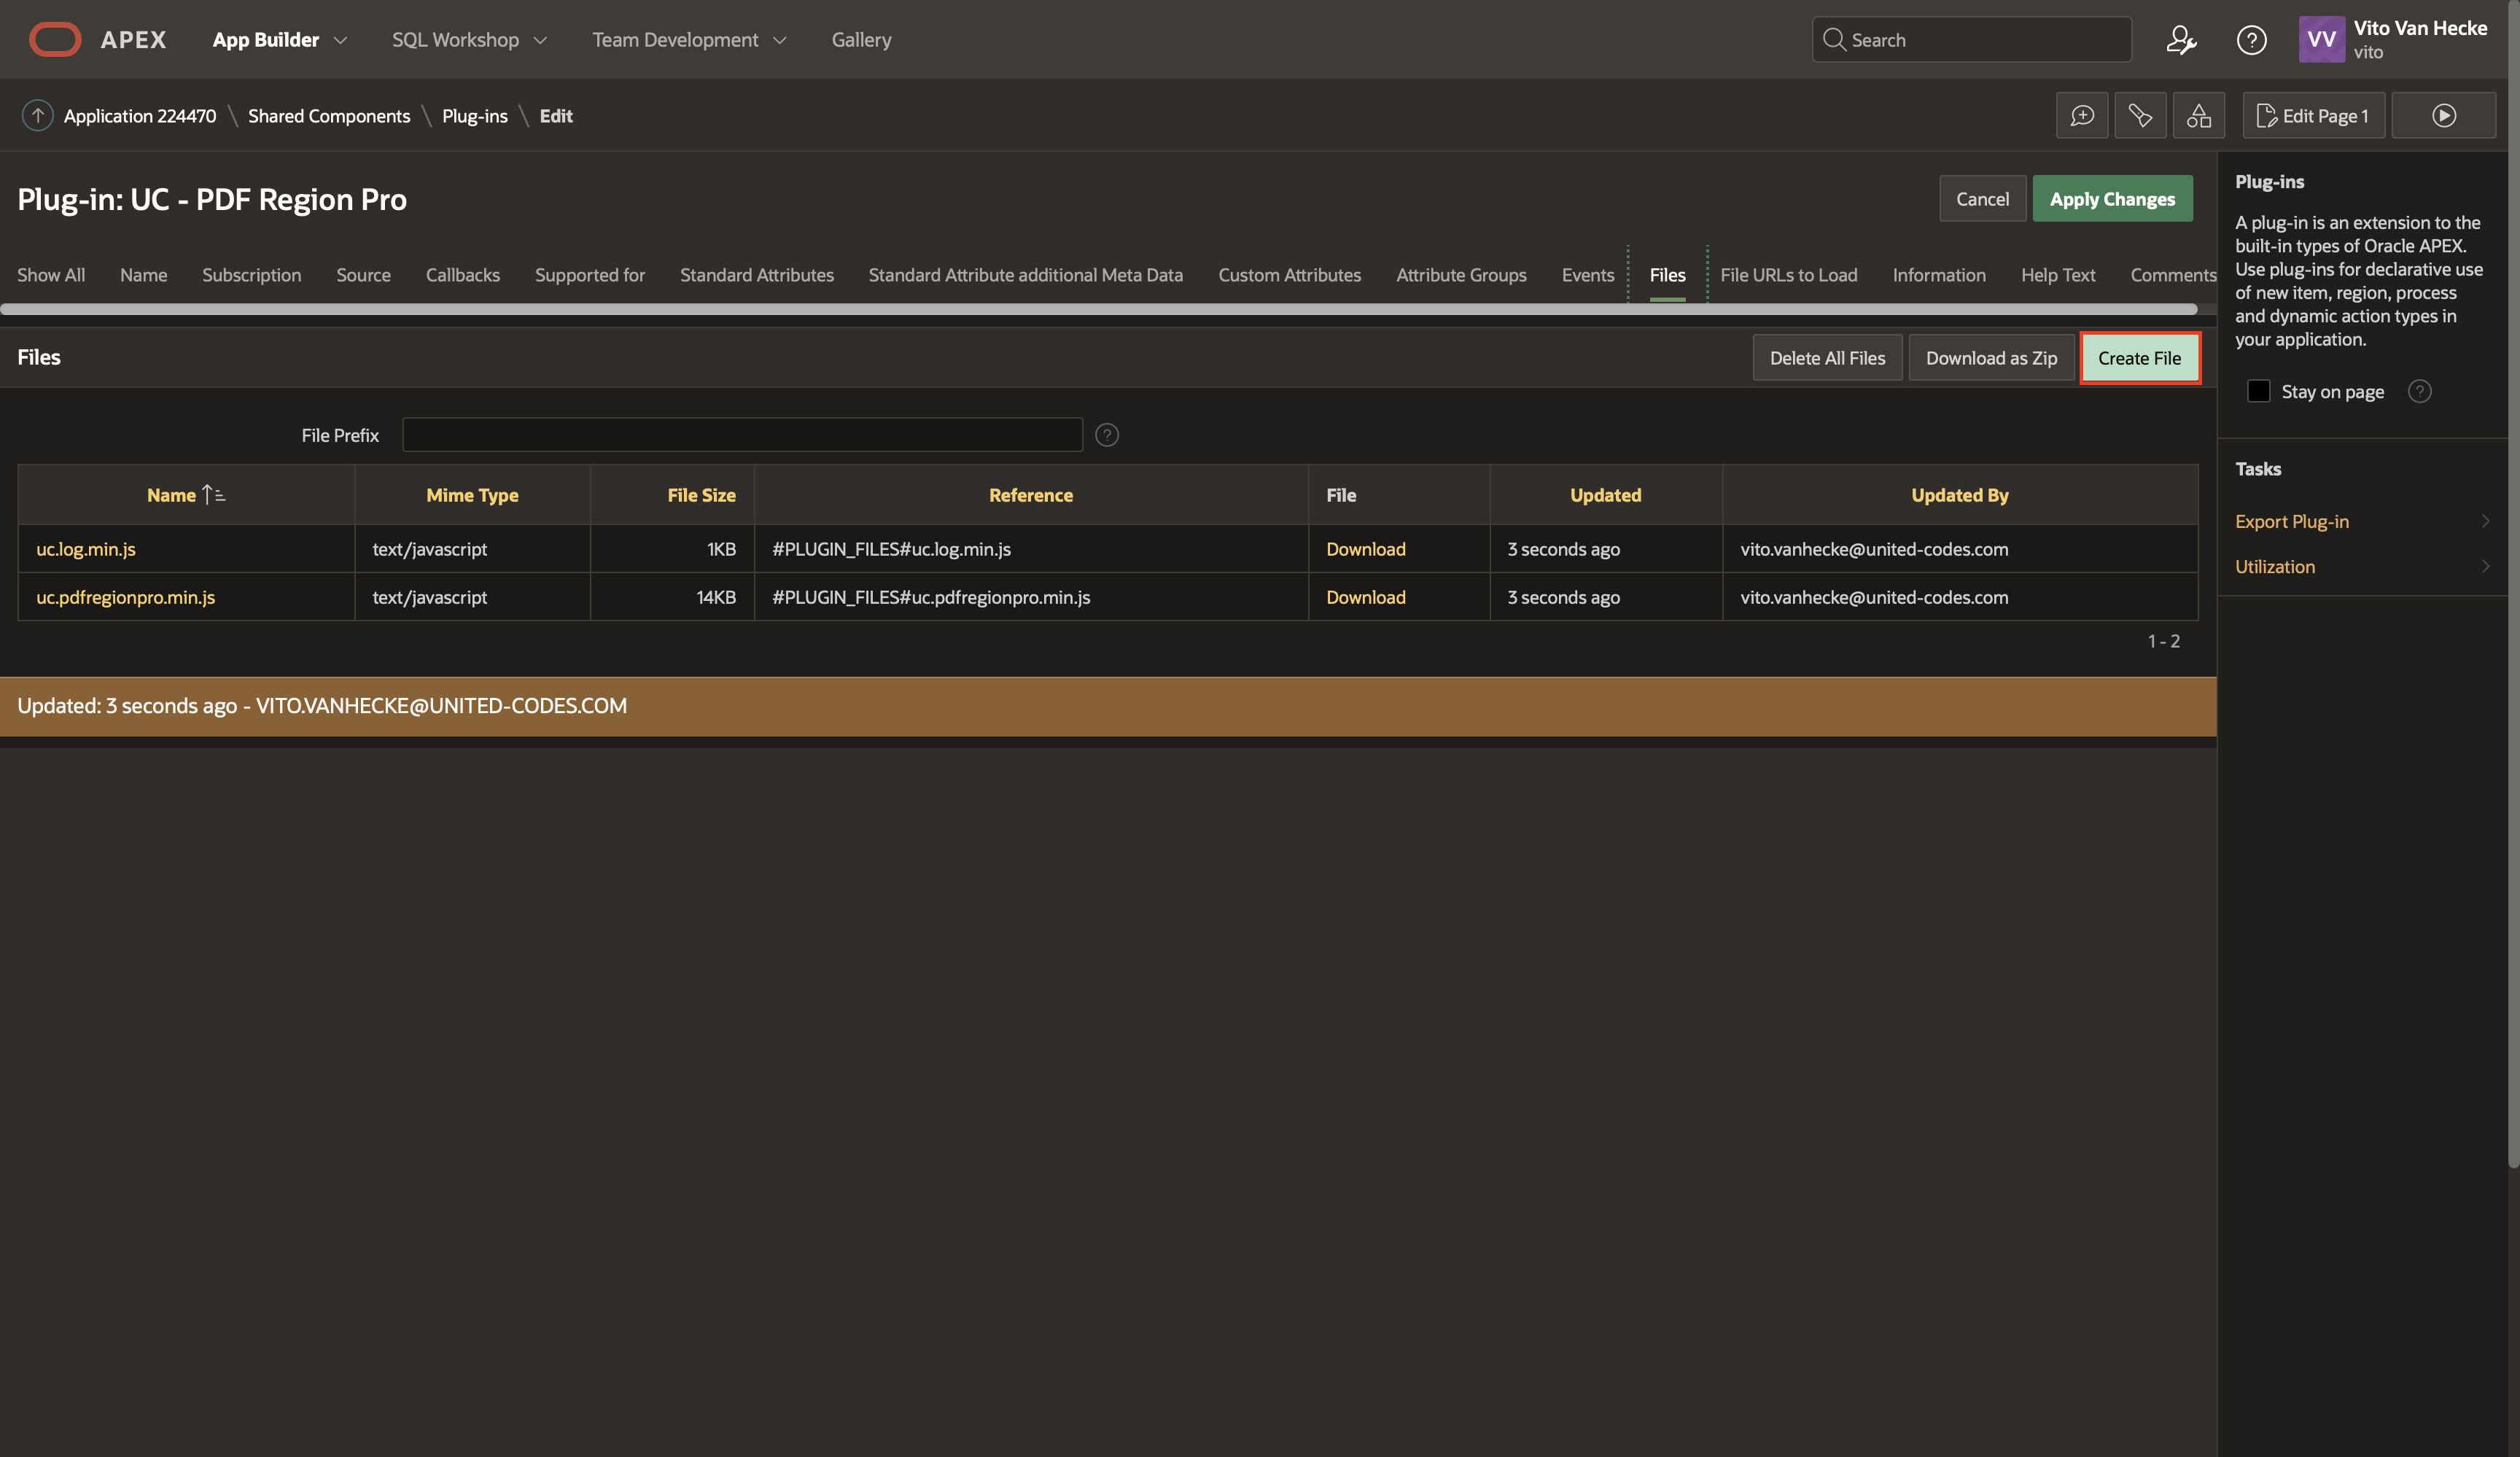
Install necessary files
When you have installed the plugin in your app (or installed the sample app), when you launch the app now you will get a message saying that you need to install the necessary files.
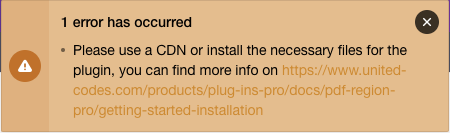
This is a big plugin, so we decided to split up the installation process in order to make the installation process more reliable.
Install using Plugin files
-
Go to Shared components in the application where you installed the plugin
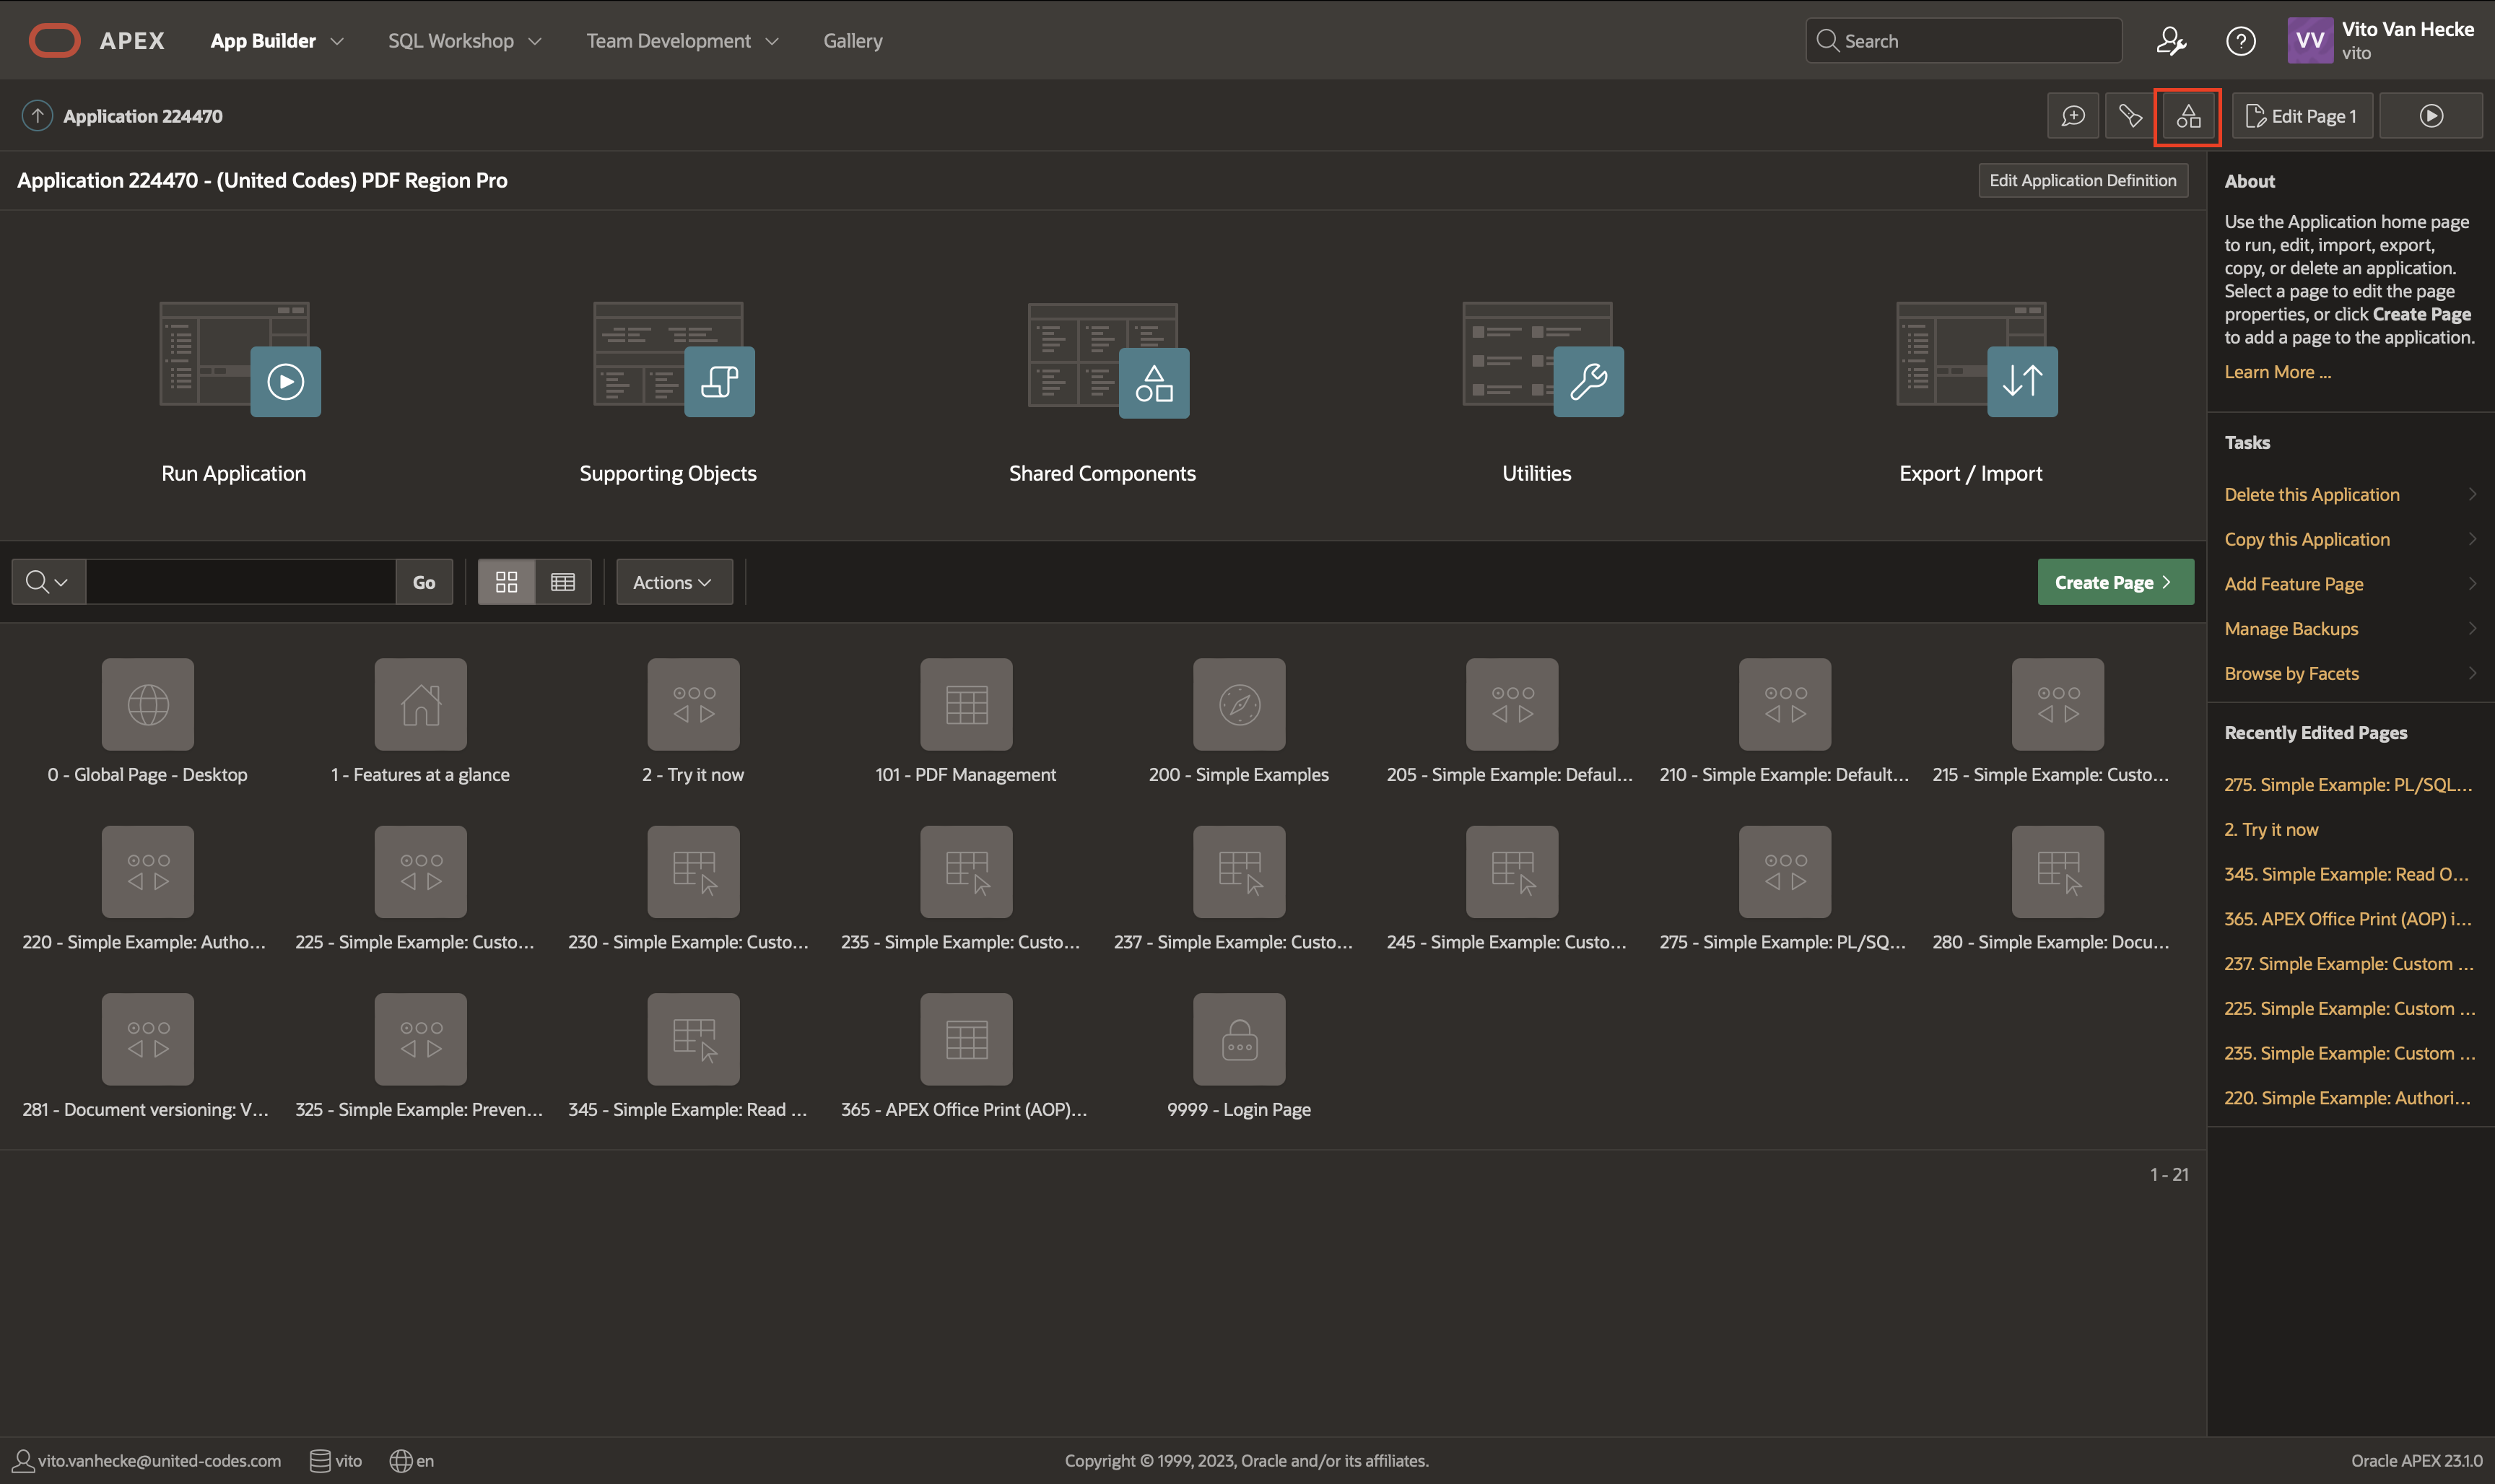
-
Go to Plug-ins

-
Go to UC - PDF Region Pro plugin

-
Scroll down on this page until you see the Files tab or just press the Files tab in the navigation bar at the top

-
Press Create File
-
Drag and Drop lib.zip file in the extra's folder from the plugin download
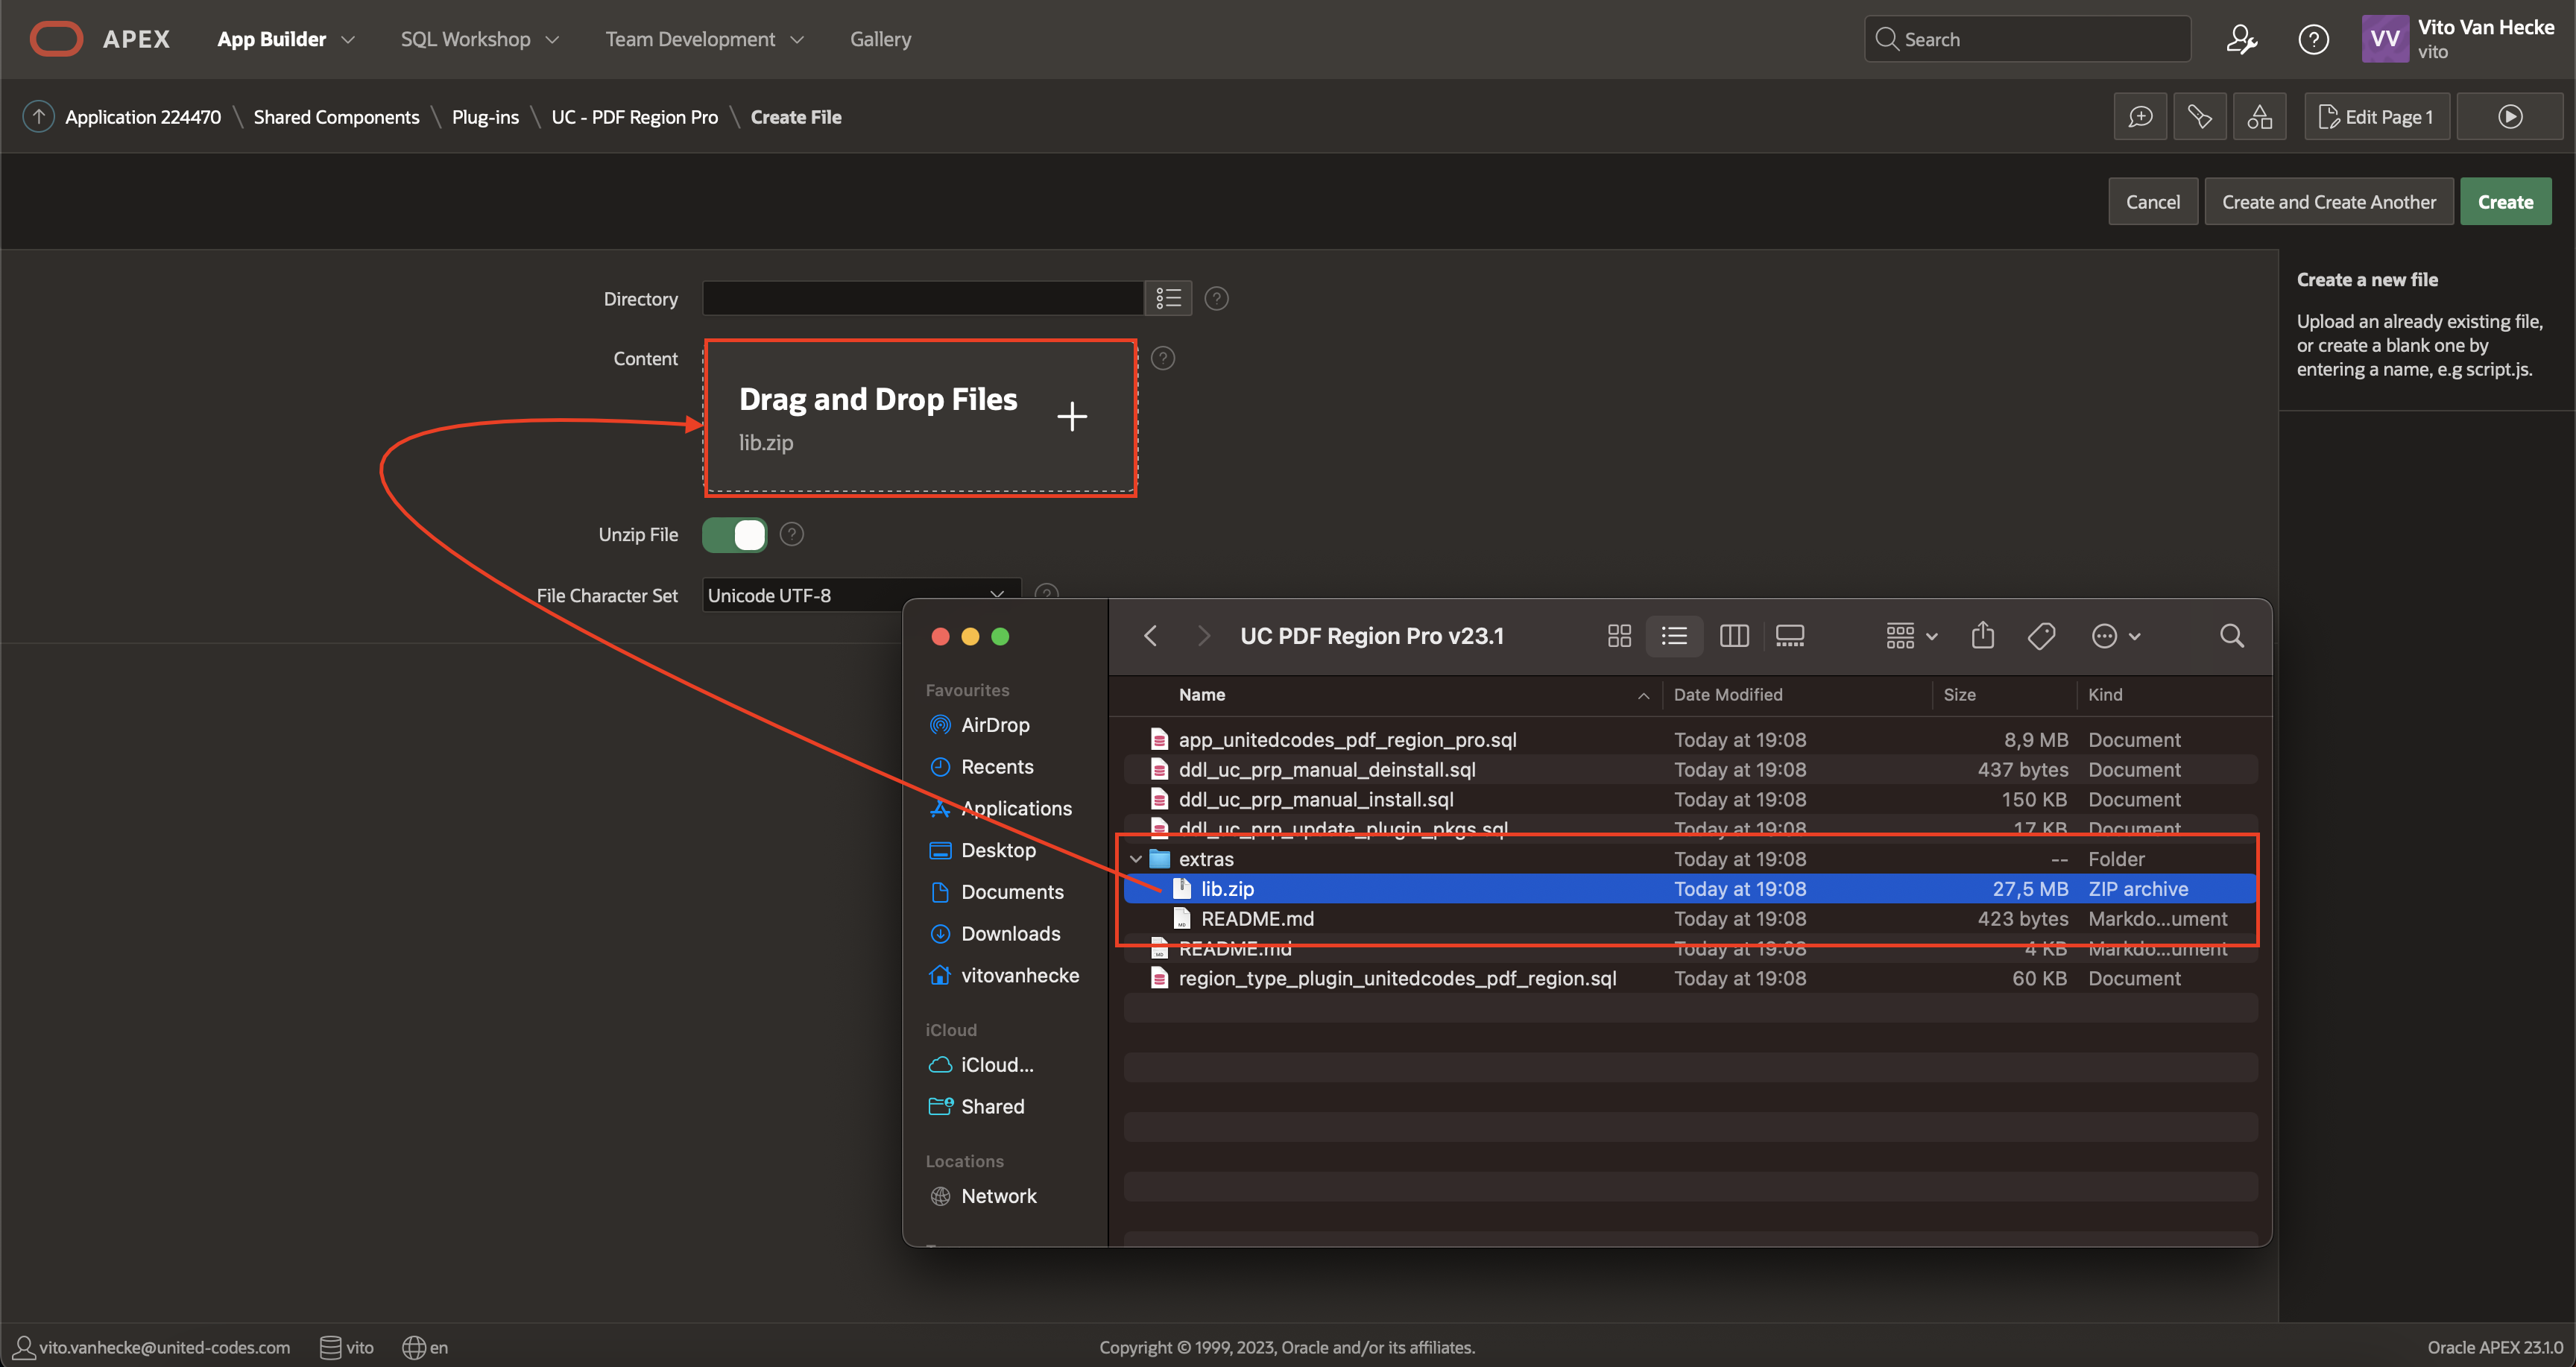
-
Click the Create button (please stay on this page until the files are all created this can take a while)

-
Now you can run your application and all should be installed!
Install using CDN
For more information you can look at the official documentation U can also self host the lib folder on a self hosted webserver.
- Just extract the files and and upload them to a folder on your server.
- Make sure the folder is publicly accessible.
- Go to the ui folder and add the origin on which Oracle APEX is hosted to the file 'configorigin.txt' (Not doing this will cause the plugin to not work)
- Go to the plugin attributes and switch the External Lib folder to Y
- Provide the URL of the folder in the External Lib Path field
- Save the plugin
- Go to the application and run it
- You should see the plugin working
Activate license
After successful installation, the plug-in license has to be activated using PL/SQL code. The instructions describe activating the plug-in United Codes PDF Region Pro in the Trial Mode.
Get a license from the portal
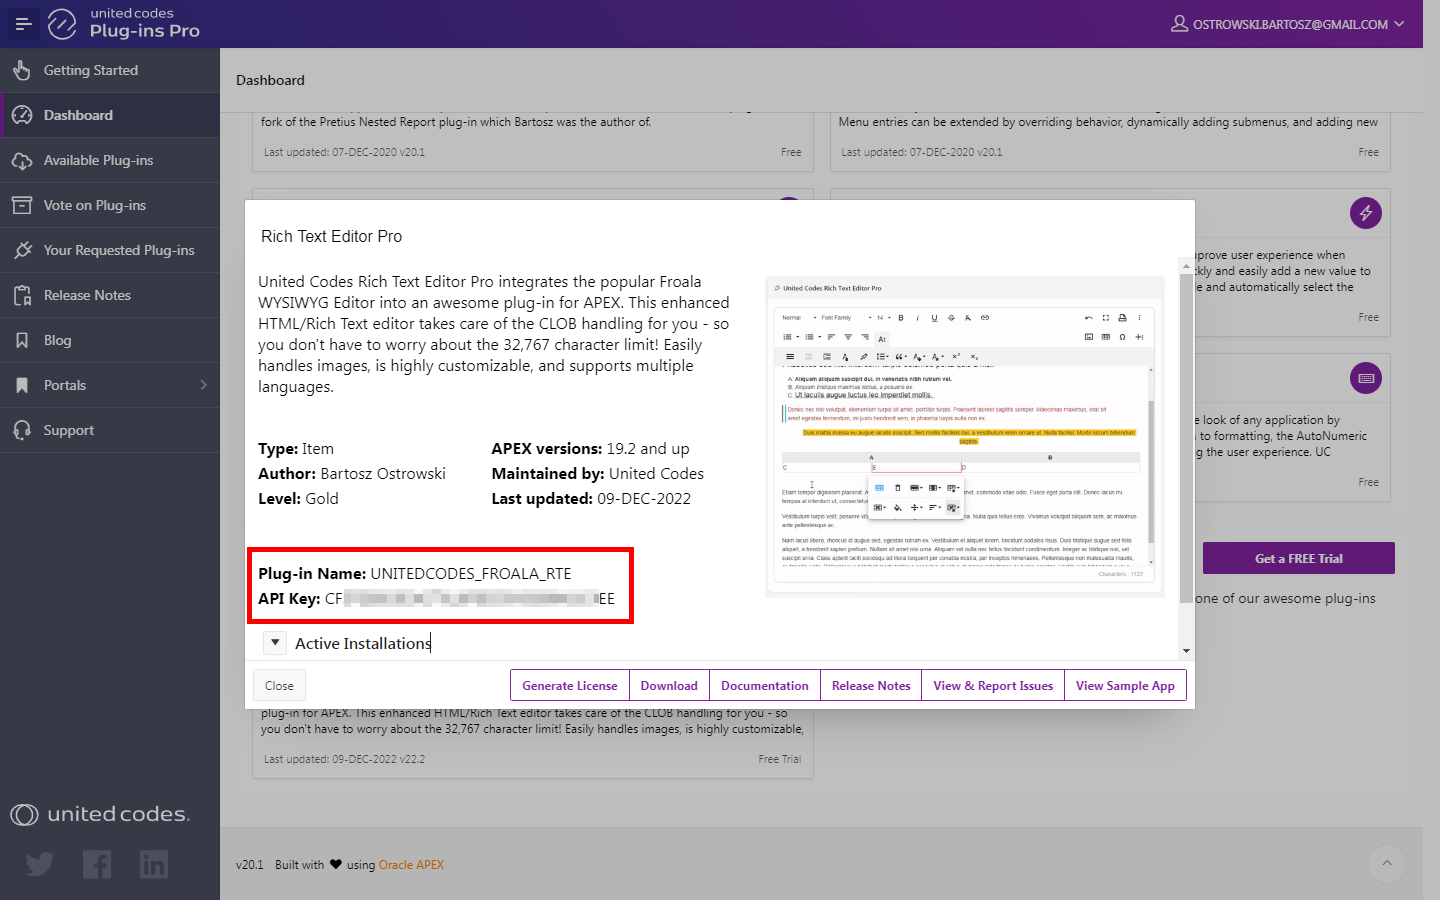
The license activation process requires the plug-in license API key and plug-in name. Both information can be found in the United Codes Plug-ins Pro portal.
-
Log into Plug-ins Pro Portal
-
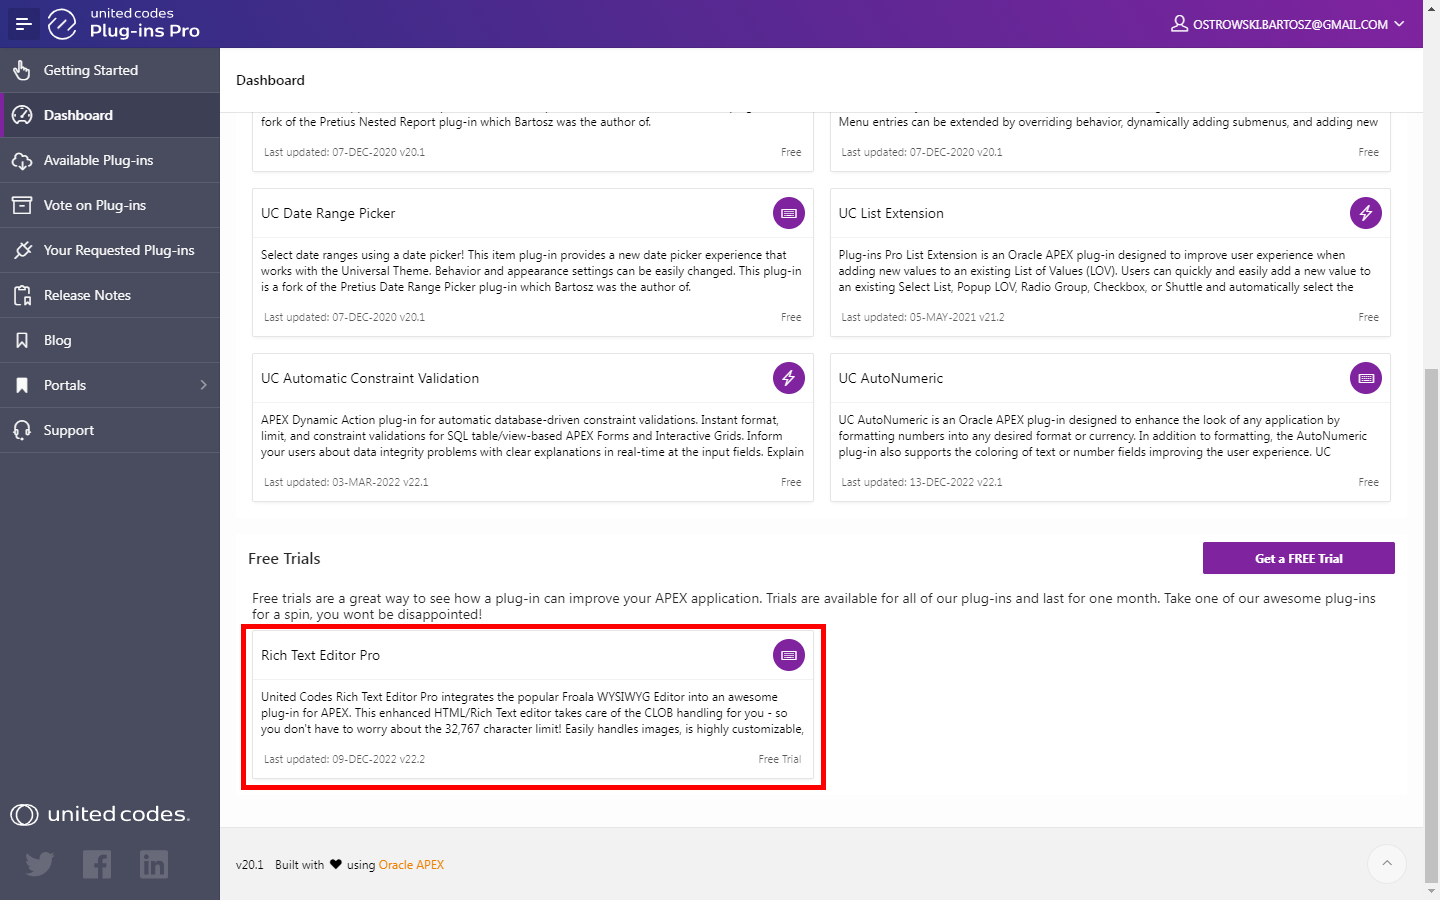
Scroll the dashboard page to the section Free Trials
-
Click the PDF Region Pro Editor Pro card

-
The plug-in name and the API key are presented in opened modal page. These values are required to activate the plug-in in the next steps
-
Proceed to the next step Activate license using PL/SQL code.
Activate license using PL/SQL code
Activating the plug-in license requires executing PL/SQL code in Oracle APEX SQL Workshop \ SQL Commands. The plug-in can be activated using two scenarios:
- When Oracle APEX schema has access to the internet
- When Oracle APEX schema has no access to the internet
Schema has access to the internet
When the Oracle APEX schema in which the plug-in is installed has access to the internet, the activation process requires only executing PL/SQL code in Oracle APEX SQL Workshop.
- Go to SQL Workshop \ SQL Commands
- Run the
auto_licenseprocedure
begin
  uc_pluginspro.auto_license(
    p_plugin  => 'PLUGIN_NAME', -- the plug-in name presented in the Plug-ins Pro dashboard modal
    p_api_key => 'YOUR_API_KEY' -- the plug-in API key presented in the Plug-ins Pro dashboard modal
  );
end;
In the result of executing the code, you should see the successful message:
Plug-ins Pro license saved for plug-in: UNITEDCODES_PDF_REGION.
See the example screenshot below.

The plug-in has been activated and is ready to use. The successful activation can be checked in the Plug-ins Pro portal. See the screenshot below.

Schema has no access to the internet
When the Oracle APEX schema in which the plug-in is installed has no access to the internet, the activation process requires executing PL/SQL code and generating the plug-in license in the Plug-ins Pro portal.
Execute manual activation #1
- Go to SQL Workshop \ SQL Commands
- Run the
manual_licenseprocedure
begin
  uc_pluginspro.manual_license(
    p_plugin  => 'PLUGIN_NAME', -- the plug-in name presented in the Plug-ins Pro dashboard modal
    p_api_key => 'YOUR_API_KEY' -- the plug-in API key presented in the Plug-ins Pro dashboard modal
  );
end;
You should see a message with key value. The key is needed to generate a license key in the Plug-ins Pro portal.

Copy the printed key value and proceed to the next step.
Generate license key in Plug-ins Pro Portal
-
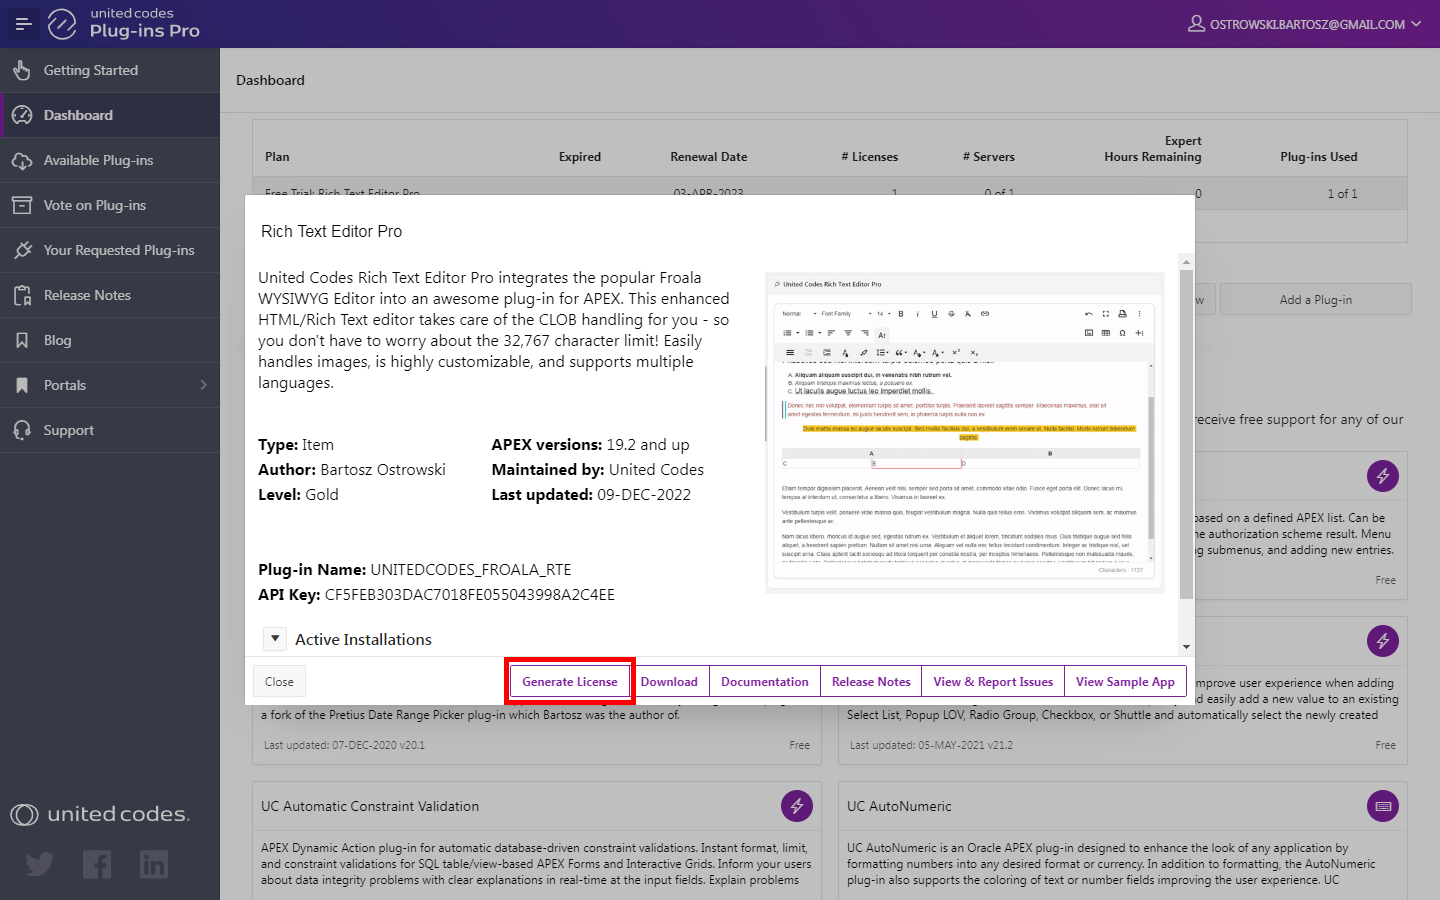
Go to the Plug-ins Pro portal dashboard
-
Click on the PDF Region Pro Pro card
-
Click the button Generate license
-
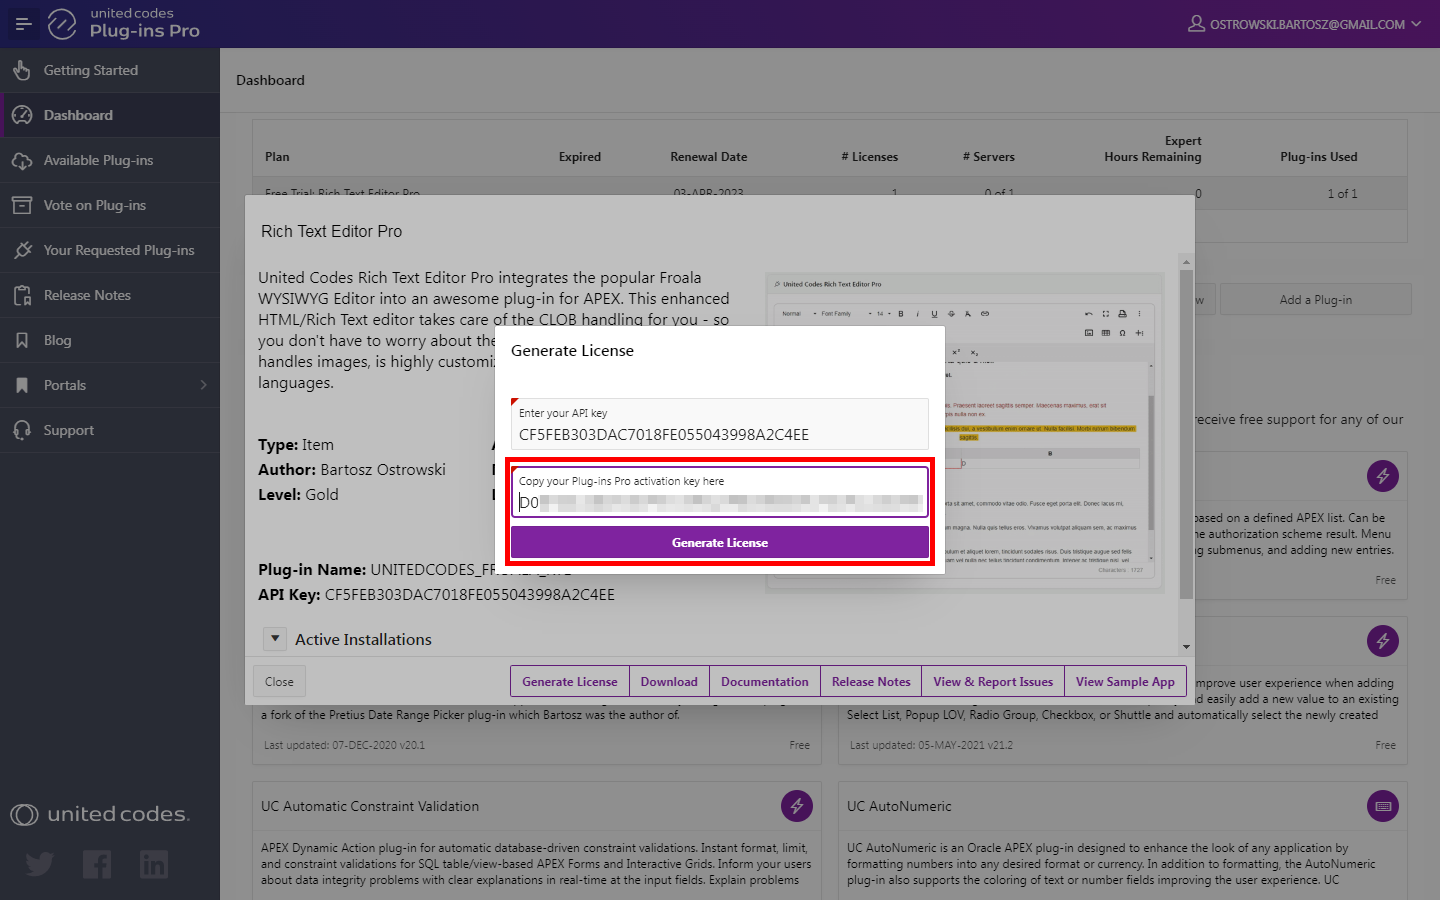
Paste the copied key valuein the new modal window.
-
Click the button Generate license
-
In the result, the plug-in license key is generated
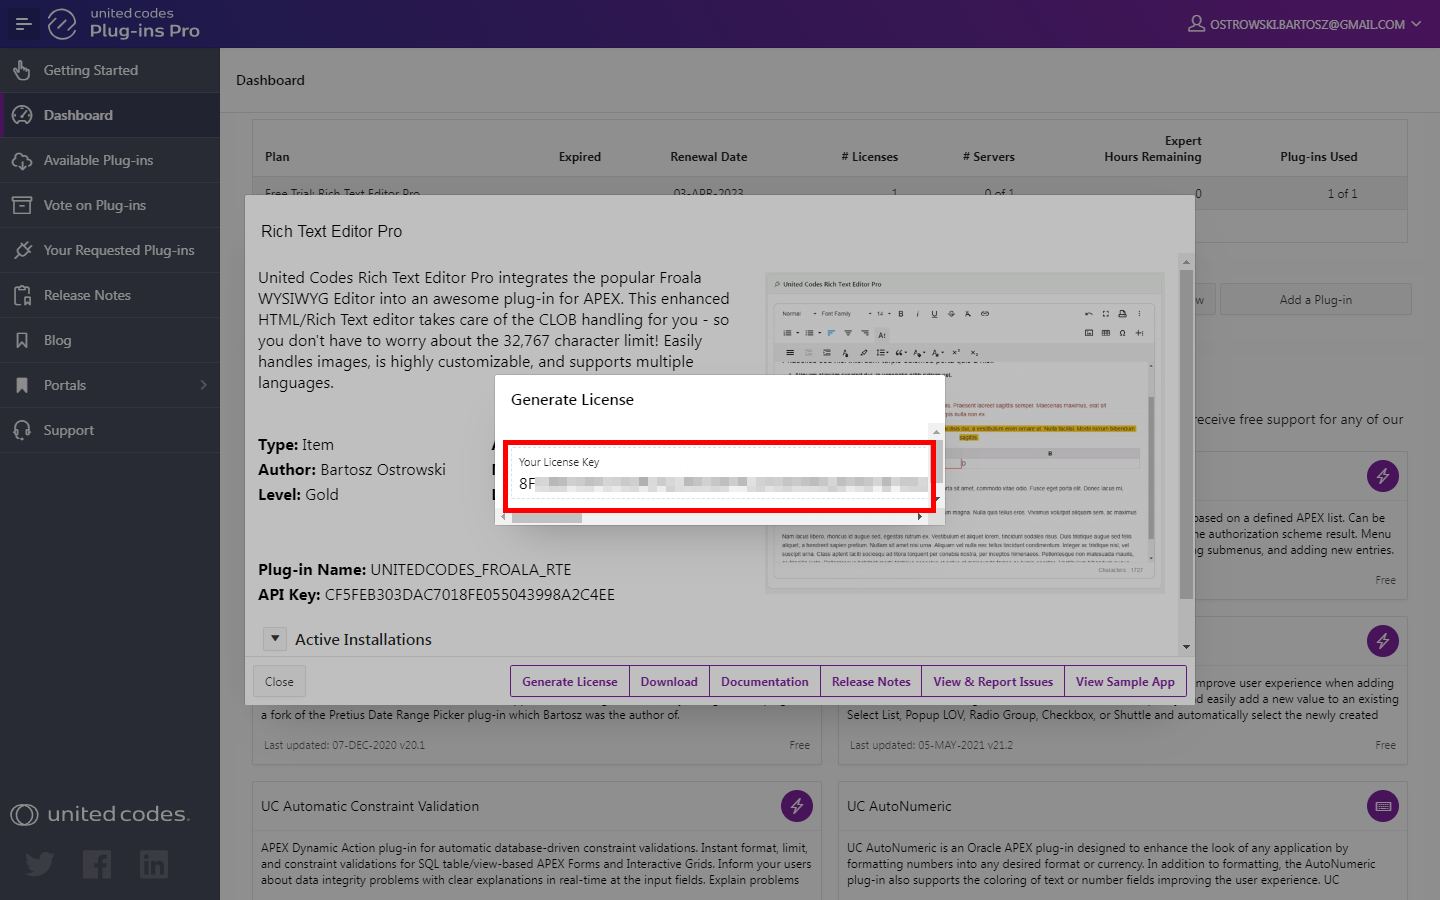
-
Copy the generated license key and proceed to the next step.
Execute manual activation #2
- Go back to APEX SQL Commands
- Execute the procedure
manual_licensewith parameterp_license_keyset to copied license key
begin
  uc_pluginspro.manual_license(
    p_plugin  => 'PLUGIN_NAME',  -- the plug-in name presented in the Plug-ins Pro Portal
    p_api_key => 'YOUR_API_KEY', -- the plug-in API key presented in the Plug-ins Pro Portal
    p_license_key => 'GENERATED_LICENSE_KEY' -- license key copied from Plug-ins Pro Portal
  );
end;
In the result of executing the code, you should see the successful message:
Plug-ins Pro license saved for plug-in: UNITEDCODES_PDF_REGION

The plug-in has been activated and is ready to use. The successful activation can be checked in the Plug-ins Pro portal. See the screenshot below.